For those of you who were unable to attend the Technical conference this year, many of the session videos and presentations are now available via partnersource. I’m looking forward to getting stuck in on these.
From time to time it is useful to determine the history of restores that a database has gone through. For example if you maintain a local copy of a client database / environment and would like to determine the exact date it was last refreshed. The following script is useful for getting this restore history from SQL:
SELECT [rs].[destination_database_name],
[rs].[restore_date],
[bs].[backup_start_date],
[bs].[backup_finish_date],
[bs].[database_name] as [source_database_name],
[bmf].[physical_device_name] as [backup_file_used_for_restore]
FROM msdb..restorehistory rs
INNER JOIN msdb..backupset bs
ON [rs].[backup_set_id] = [bs].[backup_set_id]
INNER JOIN msdb..backupmediafamily bmf
ON [bs].[media_set_id] = [bmf].[media_set_id]
ORDER BY [rs].[restore_date] DESC
Sample Output
If you’ve got any blocks of code that you use frequently, e.g. specific comment blocks, you can very easily add code short cuts in AX 2012 to auto-insert the them in to your X++ code.
For example you can setup AX to automatically create surrounding comment such as
whenever you type “mycom” and press the tab key.
How do you accomplish this. Very easily!
Step1: Locate the class EditorScripts in the AOT.
Step2: Create a new method with the format public void template_flow_[shortcut](Editor editor)
Step3: User the editor parameter to add code the code that you would like inserted. e.g. editor.insertLines(“\\test comment”);
Step4: Add your method to the case statement in the isApplicableMethod method in the section relating to template “editor scripts that does not apply to Macros”
Thats it, now if you type your shortcut into any editor in AX and press tab, the “\\test comment” code will be inserted.
Here’s a full example method
The above creates the following output:
Repost from my old blog: https://workflowax.wordpress.com/2012/03/19/527/
Problem description: Form parts in Dynamics AX usually make use of linked data sources to activate changes. However there may the case that your form part does not have a direct datasource link to the parent form or simply needs to activate code to populate the info displayed. In this case one needs a mechanism to call code on the form part when the record on the parent form is changed.
Solution: To resolve the issue one needs to create method call-backs between the two forms. Two approaches need to be followed based on whether the form part has been added to a list page or to a normal form.
Standard forms
ListPage variation
If you are planning on using the form part as part of a list page. You need to make the following adjustments.
Challenge/Problem: Many Dynamics AX Workflow work-items that need to be reassigned at once.
Description: At times we have had the request from clients to reassign many workitems from one person to another. My first reaction is why weren’t delegation parameters setup on the user so that one doesn’t need to manually reassign. However I have come to realise over time that there are a couple of good reasons to do so such as a person falling ill suddenly, a mistake in the workflow config, failure to set delegation parameters in time etc…
Solution: The following script/job designed for AX workflow will reassign workitems from one user to another. You can modify your query a bit to restrict the items to just the one that you want. The attached one simply reassigns all items currently assigned to user “123456” to user “654321”.
NOTE: This will not affect items in your workitem list as a result of queues
static void workflowMassReassign(Args _args) { UserId fromUser = "123456" UserId toUser = "654321"; //Comment for workflow history str comment = "Auto-Reassign 2014/11/26 08:00"; WorkflowWorkItemTable workitems; int i; while select workitems where workitems.Status == WorkflowWorkItemStatus::Pending && workitems.UserId == fromUser { WorkflowWorkItem::delegateWorkItem(workitems.Id, toUser, comment); i++; } info(strFmt("Items re-assigned: %1",i)); }
When saving records in a form in Dynamics AX a lot of methods are fired off both on the form as well as on the table itself. I haven’t found another flow diagram describing what methods are fired and in what order, so I tested and found the results displayed in the diagram to the left:
Comment below if you have corrections or additions to this diagram.
Happy daxing.
Challenge/Problem: Synchronise Dynamics AX database from X++
Description: Previously I have written code to manipulate AX AOT objects via code (reflection) and found the need to kick off a database sync automatically from X++ code. I found the code snippets below to be useful for this operation.
The following two options allow you to perform the db syncronisation.
1. To synchronize a specific table: appl.dbSynchronize([tableid]);
2. To synchronize the whole app: appl.dbSynchronize(0);
Challenge/Problem: Many line level workflows that need to be resumed.
Description: Sometimes due to data or setups one may have numerous line level workflows failing and entering a “Stopped” state. This may be a result of calendars that do not have enough dates created, users who have been disabled etc… If the workflows were header level, it is easy enough to select all in the Workflow History form and click resume, however on line level workflows one needs to view each line level workflow individually and resume them.
Solution: The following job can be used to perform mass resume on stopped workflows. You can adapt the SQL to limit to certain documents or document types of necessary.
static void resumeStoppedWorkflows(Args _args) { WorkflowTrackinStatusTable tracking; int i, j; while select tracking where tracking.TrackingStatus == WorkflowTrackingStatus::Faulted && tracking.WorkflowType == WorkflowTrackingStatusWorkflowType::DependentSubworkflow { try { Workflow::resumeWorkflow(tracking.CorrelationId, "Auto-resumed"); i++; } catch (Exception::Error) { //Some may not be able to be resumed but we dont want to stop the process j++ } } info(strfmt("%1 workflows resumed, %2 workflows could not be resumed")); }
Challenge / Problem: Maintaining email templates across multiple companies.
Descritpion: Dynamics AX makes use of email templates for various bits of functionality in Dynamics AX, including workflow notifications and alert notifications. If you are using workflow in multiple companies and want to keep the same workflow template across the board, it can be quite frustrating to have to make the same changes in every company. The following script/job in X++ will help sync all (or some) system email templates and their respective languages into every company in Dynamics AX.
/// Copies All System Email Template to all companies /// WARNING: Will create or overwrite existing templates in other companies static void syncWorkflowTemplates(Args _args) { DataArea DataArea; SysEmailSystemTable email; SysEmailTable local; SysEmailMessageSystemTable message; SysEmailMessageTable localMess; WorkflowParameters params; void FindOrCreate() { local = SysEmailTable::find(email.EmailId, true); if (local.RecId) { info(strFmt("Deleting %1 (%2)", local.EmailId, curext())); local.delete(); } local.DefaultLanguage = email.DefaultLanguage; local.Description = email.Description; local.EmailId = email.EmailId; local.Priority = email.Priority; local.SenderAddr = email.SenderAddr; local.SenderName = email.SenderName; info(strFmt("Adding %1 (%2)", email.EmailId, curext())); local.insert(); } void FindOrCreateMessage() { localMess.clear(); localMess = SysEmailMessageTable::find(message.EmailId, message.LanguageId, true); if (localMess.RecId) { info(strFmt("Deleting %1 %2 (%3)", localMess.EmailId, localMess.LanguageId, curext())); localMess.delete(); } localMess.EmailId = message.EmailId; localMess.LanguageId = message.LanguageId; localMess.LayoutType = message.LayoutType; localMess.Mail = message.Mail; localMess.Subject = message.Subject; localMess.XSLTMail = message.XSLTMail; info(strFmt("Adding %1 %2 (%3)", localMess.EmailId, localMess.LanguageId, curext())); localMess.insert(); } ttsBegin; // Restrict to specific templates in a where clause if necessary while select email { while select DataArea where !DataArea.isVirtual && DataArea.id != email.dataAreaId { setPrefix(DataArea.Id); changecompany (DataArea.Id) { FindOrCreate(); } while select message where message.EmailId == email.EmailId { changecompany (DataArea.Id) { FindOrCreateMessage(); } } } } ttsCommit; }
Following up on my previous post on the use of Eventing for model management today’s post will demonstrate how to use eventing effectively on the validateWrite method of tables. This can be very useful for additional model specific data validation without overshadowing the original method.
In this example I will use the validateWrite of the PurchReqLine table.
Instructions
1. Create a new class e.g. MyPurchReqLineEventHandler
2. Create a new static method in this class e.g. public static void validateWritePurchReqLine(XppPrePostArgs _args)
3. In the class retrieve the current boolean return value so that you can take it into account: boolean ret = _args.getReturnValue();
4. Get the original PurchReqLine Table record so that you can use it in your logic: PurchReqLine line = _args.getThis();
5. Add your logic to the method taking into account the current return value e.g.
if (ret)
{
ret = purchReqLine.myField != “”;
}
6. Set the return value (either at the end of your method or within the if (ret) statement: _args.setReturnValue(ret);
7. Create the event subscription
7.1 Navigate to the PurchReqLine table in the AOT
7.2 Expand the methods section.
7.3 Right click on the validateWrite method. Click “New Event Handler Subscription
7.4 Rename the Subscription to a name that reflects your model
7.5 Modify the CalledWhen property of the Subscription to “Post”
7.6 Modify the Class property of the Subscription to “MyPurchReqLineEventHandler”
7.7 Modify the Method property of the Subscription to “validateWritePurchReqLine”
7.8 Save the class.
You’re all done. Now test and enjoy.
Please let me know if you have any comments or suggestions on the above. Keep an eye out some more samples like this in the next few days and weeks.
Since AX 2012 brought in the concept of models I have been very interested in utilising them to their full potential with our clients and our products. With certain things such as entirely new tables, classes, forms etc, the model concept works very well. It even works well when it comes to individual components on forms or new fields or methods as they are all regarded as individual objects in AX that can be plugged in and out of AX with models.
Where things start to become a bit harder is on shared objects such as standard methods etc. So how do we overcome some of these challenges. Hopefully over the next while I will post some useful design patterns and tools that one can use to keep one’s models clean and separated where at all possible. An added bonus of keeping your code separate is that it make performing Cumulative updates or 3rd party updates alot easier as there is less overshadowing.
Eventing
One of the most useful tools for keeping models separate is the new Eventing functionality in Dynamics AX 2012. Eventing has a number of benefits, but in regards to model management eventing allows one to keep your code (the event handler method) in a separate model to calling class as well as keeping the event subscription that calls your code in your separate model.
Eventing on Table Methods e.g. initFrom
Using event handlers and subscriptions on table methods are one of the areas that are very useful for model management. For example you may have added new fields to a standard table such as PurchTable that you would like to initialise as part of the “initFromRFQTable” method without overshadowing standard AX code. Using event an event handler you could do the following;
1. Create New class e.g. MyEventHandler
2. Add a new static method to the class e.g. initFromRFQTable that accepts an XppPrePostArgs object as a parameter.
3. Get a reference to the calling object, in this case the PurchTable e.g. PurchTable purch = ppArgs.getThis();
4. Get a reference to the calling method’s parameter e.g. _purchRFQTable
5. Perform any initialisation that is necessary e.g. purch.MyField = rfq.MyField;
public static void initFromRFQTable(XppPrePostArgs ppArgs) { PurchTable purch = ppArgs.getThis(); PurchRFQTable rfq = ppArgs.getArg('_purchRFQTable'); purch.MyField = rfq.MyField; }
Note that this method has access to all the parameters of the PurchTable::initFromRFQTable as well as access to the PurchTable object itself, so you can perform close to anything that you would be able to perform in the method itself.
For a direct example look at how Microsoft has done this for localisations on the PurchTable’s initFromVendTableMethod.
In the next few weeks I’ll publish more model management tools, tricks and design patterns. If you have any of your own please let me know as well.
Requirement:
As you may be aware by now, AX allows one to create users of type “active directory group” which if setup will auto-create users who belong to that group when they try to login. Furthermore users (whether auto-created or manually created) who belong to these groups will inherit the security permissions assigned to these groups.
One challenge however is, to debug this. I.E. Finding out which users are members of specific groups or what groups a specific user belongs to. My previous post was about how to determine ownership via command line. After a bit of reflection I thought this may be better and more useful to have this functionality directly within AX. Using Attached is an XPO with the relevant code (use at your own risk).
Basically it adds a class to AX as well as a lookup menu item to UserListPage form and the User form.
Please let me know your comments.
Here is a sample job if you don’t want to download the full project. It prints all groups for a user.
static void adGroups(Args _args) { System.DirectoryServices.AccountManagement.PrincipalContext yourDomain; System.DirectoryServices.AccountManagement.UserPrincipal user; System.DirectoryServices.AccountManagement.GroupPrincipal p; CLRObject groups, enum; System.String domain, username1,groupName; str groupN; Userid userId = curUserId(); InteropPermission permission; UserInfo userInfo; try { permission = new InteropPermission(InteropKind::CLRInterop); permission.assert(); yourDomain = new System.DirectoryServices.AccountManagement.PrincipalContext(System.DirectoryServices.AccountManagement.ContextType::Domain); // find your user userInfo = xUserInfo::find(false, userId); domain = UserInfo.networkDomain; username1 = UserInfo.networkAlias; user = System.DirectoryServices.AccountManagement.UserPrincipal::FindByIdentity(yourDomain, username1); // if found - grab its groups if(user != null) { groups = user.GetAuthorizationGroups(); enum = groups.GetEnumerator(); while (enum.MoveNext()) { p = enum.get_Current(); groupName = p.get_Name(); groupN = groupName; info(groupN); } } CodeAccessPermission::revertAssert(); } catch (Exception::CLRError) { CodeAccessPermission::revertAssert(); info(CLRInterop::getLastException().ToString()); } }
As you may all be aware, AX 2012 offers certain ability to manage your Dynamics AX 2012 users via Active directory groups. Hopefully more on that later. (Check out this post in the meantime http://blogs.msdn.com/b/dynamics-coe/archive/2013/01/13/using-windows-ad-groups-for-user-management-in-ax2012.aspx)
The one problem however is that it becomes quite difficult to trouble shoot security settings. For example how to determine whether a user is actually part of an active directory user group. If you are not a domain admin you can try and use the following two command prompt instructions
1. To detemine an individual user’s groups
net user /domain [username]
e.g.: net user /domain jonathanhalland
2. To detemine all users belonging to a specific group
net group /domain [groupname]
e.g.: net group /domain axrequisitioncreators
Problem / Symptoms: You receive the following message whenever running code or services running in CIL: The client cannot download the services metadata from http://[SERVERNAME]:8101/DynamicsAx/Services/AxClient?wsdl. The metadata address of the AOS services is incorrect or the AOS services are down. Please contact your system administrator.
Description: When running code in CIL (e.g. Services, batch jobs, Reports etc) you may receive the above error message. The cause of this problem could be multiple, but it basically means that the AOS or client cannot connect to the AX2012 services for one reason or another.
Resolution: This could possibly be a DNS or some networking failure that you can test by trying to ping the the server that the services run on and resolving the issue as needed.
In our specific case, we experienced an issue that is probably very rare, we have a proxy server configured on the AOS server’s Internet options. However the “Bypass proxy server for local addresses” was not selected, therefore the server could not even access services located on itself. To resolve:
Repost from: http://workflowax.wordpress.com/2013/10/22/using-json-in-dynamics-ax/
I’ve recently had a requirement to integrate an external system (Toggl www.toggl.com) with Dynamics AX 2012’s Timesheet system. However the external system only provided a JSON API which isn’t supported natively by the Dynamics AX AIF system. After some research and trial and error (using various DLL’s) I eventually stumbled across some really useful classes provided by the Retail module in Dynamics AX2012. These classes (although named “Retail…”) provide a really easy and elegant JSON interaction for any use. Here is a very basic code sample of how to consume JSON using these classes in Dynamics AX 2012.
static void myJob(Args _args) { RetailWebRequest request; RetailWebResponse response; str rawResponse, value; Map data; RetailCommonWebAPI webApi = RetailCommonWebAPI::construct(); request = RetailWebRequest::newUrl("http://mysite.com/jsonaction"); response = webApi.getResponse(request); rawResponse = response.parmData(); data = RetailCommonWebAPI::getMapFromJsonString(rawResponse); value = data.lookup("elementname"); info(strFmt("Element name: %1",value)); }
If you are interested in some more advanced examples of using JSON in AX (e.g. using authentication, retrieving subsets of info or arrays) or doing some of your own integration into Toggl timekeeping please let me know and I’ll post some more info.
Problem / Symptom: AX2012 XPO files are not generally compatible with AX 2009. Description: When porting an XPO created in AX2012 back into AX2009 one is unable to do a compare against various types of object such as forms, classes, tables etc…
Solution: NOTE 1: This solution is to aid you to back port basic code and tables but shouldn’t be regarded as a production ready solution. There is certain functionality that simply cannot be back ported such as event subscriptions etc…
NOTE 2: This is a solution in progress, please let me know if you find any additional changes that one needs to make in order to back port various other AOT XPOs.
Its not often that one needs to port code from a newer system into an older system, but sometimes the occasion does arise as it did for me this week. We have some new functionality in our AX2012 products that we really wanted to port back to AX2009 and a manual compare with both systems open is not really an option and doesn’t actually work for most objects.
The critical areas for us to be able to port back are the tables, classes and forms, all three don’t work. When selecting an element in the AX2009 XPO import form and clicking import, nothing happens. NOTHING, no error messages etc.. I started comparing an AX2012 XPO with an AX2009 XPO in notepad and found the following small changes that one can make to the AX2012 XPO in order at least initiate the compare form for an import into AX2009.
1. Tables For tables the following needs to be modified. Edit your XPO in notepad and
1.1 – Delete EnforceFKRelation 0 Line
1.2 – Delete FULLTEXTINDICES…ENDFULLTEXTINDICES Section
1.3 – Delete the Methods start and end element if you have no methods on the table.
2. Classes: In your XPO
2.1 Delete references to Event Subscriptions
2.2 Add the following line right after the METHODS line in the class node:
Version: 3
Problem / Symptom: How to automatically set the status bar options (Under User Options) for all users.
Description: As a developer or functional consultant we quite often receive support requests from users with very little information as to their circumstances under which the issue occurs. E.G. What environment where they working on (Prod, QA, Dev)? What is their userId etc (in order to find out security settings applied)? What currency? and most importantly what AX company they are logged into. All of this information can be set to be displayed in the users status bar by setting enabling it per user under Administration -> Users -> Options -> Status Bar.
It really helps to have it set over there so that screenshots will normally just show this information.
However you may want to set these options globally for all users when initially configuring the system. Doing this manually is quite a tedious process and there is no field per setting to do it in a quick sql script or AX job. Rather AX stores it in a single binary field called “Userinfo.StatusLineInfo” and uses bitwise operators for setting and reading the individual options. This really makes it a bit tricky to set but is very efficient in terms of space and reading speed for the system.
So how do you perform this global setting? My first two options will show you how to set all users to have the same option sets, my last solution will show you how to set only one specific setting for all users.
OPTION 1 (AX Solution):
1. Login with your AX user and navigate to Administration -> Users -> Options -> Status Bar.
2. Set all the status bar parameters that you would like to display for all users.
3. Create a new Job in the AOT with the following code:
static void syncAllUserToCurrentUserStatusBarOptions(Args _args) { UserInfo user, updUser; select user where user.id == curUserId(); update_recordSet updUser setting StatusLineInfo = user.StatusLineInfo; }
OPTION 2 (SQL Solution):
1. Login with your AX user and navigate to Administration -> Users -> Options -> Status Bar.
2. Set all the status bar parameters that you would like to display for all users.
3. Login to your SQL database for AX, locate your user record in the UserInfo table
4. Copy the StatusLineInfo value field value.
5. Execute the following script
update userinfo set statuslineinfo=[COPIED VALUE]
e.g.
update userinfo set statuslineinfo=-529533
This example will set all users to have the following options: Show help text, Show Utility layer, Show Company accounts, Show currency, Show UserId, Show Alert Status, Show AOS name, Show Current Model, Show Document Attachments button, Show Record Navigation buttons, Show View Edit Record Button, Show details form details/grid view buttons.
Option 3 Set a specific option for all users:
1. Open the AOT, expand forms node, navigate to SysUserSetup Form.
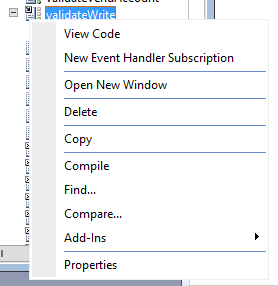
2. Right click, click “View Code”
3. Open the “ClassDeclaration” method.
4. Move down to approx line 57 where there are a whole bunch of macros entitled #LOCALMACRO.FLAG_XXXXXXXX
5. Locate the macro that has the setting that you want to use e.g. #LOCALMACRO.FLAG_StatuslineShowPartition to show the default partition. Take note of the value after the “<<” symbol. E.g. 19
6. Create a new job with the following code:
static void addStatusBarOptionToAllUsers(Args _args) { UserInfo updUser; ttsBegin; while select forUpdate updUser { updUser.statuslineInfo = updUser.statuslineInfo | (1 << [value from step 6]); updUser.doUpdate(); } ttsCommit; }
E.G. To set all users to show default partitions:
static void addStatusBarOptionToAllUsers(Args _args) { UserInfo updUser; ttsBegin; while select forUpdate updUser { updUser.statuslineInfo = updUser.statuslineInfo | (1 << 19); updUser.doUpdate(); } ttsCommit; }
7. Execute the job
NOTE: To remove a setting from all users simply replace the line
updUser.statuslineInfo = updUser.statuslineInfo | (1 << 19);
with
updUser.statuslineInfo = updUser.statuslineInfo ^ (1 << 19);
Simple as that (sortof)
Hope you benefit from this. Drop me any comments if anything is unclear.
Problem / Symptom: When publishing a journal you receive a generic “Microsoft.Dynamics.Ax.Xpp.InfoException” was thrown error. Or you receive an error “Account number for transaction type Bank does not exist.”
Description: We received this error reported by the client when trying to post a general journal recently. They received the generic type of XPP error as shown above and were not able to diagnose the problem correctly
Solution: The first step to resolving this issue was to receive better error messages so that the problem can be diagnosed. By disabling the “Execute business operations in CIL” option for the user for the duration of debugging. To do this:
1. Navigate to System Administration -> Users -> Options -> Development.
2. Untick the “Execute business operations in CIL” option.
After performing the above we were able to get a better description of our problem. “Account number for transaction type Bank does not exist.”
We were then able to diagnose that the bank account used as the offset account did not have a “main account” number setup for it. This may have been due to faulty importing. To resolve:
1. Navigate to Bank -> Cash & Bank Management -> Bank Accounts
2. Select bank account in question, click edit
3. Expand currency management and select a main account.
Problem / Symptom: You want to ensure that all your users’ Dynamics AX clients are updated to the correct rollup.
Description: You may have recently upgraded your Dynamics AX Kernel or Application to the latest Cumulative Rollup (CU), you’ve applied it to all of your AX Client installations that you are aware of but you would still like to make sure that nobody is logging into AX on an old version and potentially causing some problems. You may also be receiving an error in your AOS event log that goes something like this
Object Server 01: Internal version mismatch. Microsoft Dynamics AX client from [MACHINENAME] (6.2.158.0) tried to attach with 6.2.1000.4051 revision of kernel.
Solution: (Applies to AX 2009 & AX2012) There is quite a simple solution to this issue.
Your User log form will now show all sessions and their build number. You can now browse and field all sessions that don’t have the same build number as your kernel. You can also further filter this form to only show the non matching records by right clicking on the Build number field and entering “![buildnumber]” (see screenshot below)
Click on the “General” tab to find out which computer/workstation the invalid session was coming from. You can now go and run the updates.
Problem / Symptoms: Users need to test Dynamics AX setups as different users.
Description: Quite frequently we are finding the need to test/run Dynamics AX as a different user from our default login user but do not want to run multiple remote desktop sessions or have to log in and out of our current session. We may need to do this for a number of reasons e.g. Testing a workflow approval process i.e. login to approver as the relevant user, Testing security permissions, Testing SSRS permissions, getting screenshots of AX for documentation with a different profile etc…
Solution: There are a number of ways to do this, I have been using CMD/DOS scripts to do this for years (more on this below). But I just found the simplest trick in the book:
1. Locate a shortcut (won’t work for config files) to Dynamics AX,
2. Right click, if you’re lucky (depending on operating system) you will see a “run as a different user”. Select this option, enter your user details and AX will run as this alternative user
3. If there isn’t a “run as different user” option, simply hold in shift and then right click, you should now see the “Run as different user option”
Alternate Solution:
If you are running via config files this solution will not work, you will need to first create an AX32.exe shortcut that takes the config file as a parameter E.G.
C:\Program Files\Microsoft Dynamics AX\60\Client\Bin\Ax32.exe" -regconfig=C:\myconfig.axc
You can also create a .bat file with the following code:
runas /user:user1@mydomain "\"c:\Program Files (x86)\Microsoft Dynamics AX\60\Client\Bin\Ax32.exe\" \"C:\myconfig.axc\""
Reference: http://support.microsoft.com/kb/911363
Problem / Symptoms: SSRS Reports executed from code under limited security permissions are not displaying in AX2012 R2 or above.
Description: When running an SSRS Report that is being kicked off via code from a user role with limited security permissions, neither the report nor the report viewer is displayed. No error messages are presented. Under elevated (admin) permissions the reports are displayed. The same user is able to execute normal reports via menu-items.
The debugger will fail in class: SRSReportRun.constructReportSettings on the line settings.SetWebServiceUrl(serverConfig.serverId(), serverConfig.reportServerURL());
Solution: I wasn’t able to find any specific security permissions linked to this error that would fix the security role, however I did discover that AX seems to have deprecated the use of the SRSReportRun class in favour of the SRSReportRunController class.
Old Code:
SrsReportRun srsReportRun;
srsReportRun = new SrsReportRun (‘MyReport.ReportDesign1’);
srsReportRun.init();
srsReportRun.executeReport();
New Code
SrsReportRunController controller;
controller = new SrsReportRunController();
controller.parmReportName(‘MyReport.ReportDesign1’);
controller.runReport();
Welcome to my new blog Explore AX.com. With the advent of AX2012 and all its nifty new tools I decided that it was time to find a spot to collect all my little scripts, coding techniques and general notes to remember. Most things here will be related to development and technical issues, however you may find a few functional things as well.
For those of you who may have read my blog workflowax.wordpress.com, I have decided to keep that blog separate and dedicated to all things workflow and not pollute it with general AX stuff.
Most blog posts will be written in a typical Knowledge base approach i.e.
Anyway, I hope you enjoy the blog!
Feel free to leave comments or questions.